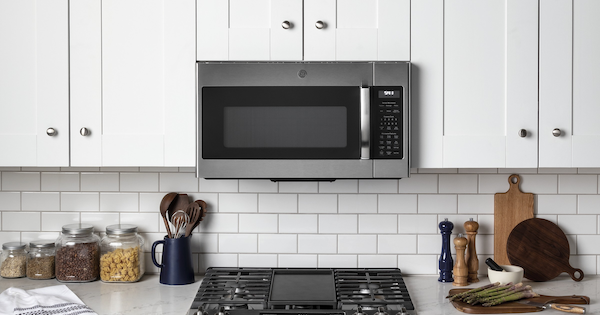
Have you purchased a new over the range microwave oven or are redesigning the kitchen and planning to install an over-the-range microwave oven with vent fan but do not know how to do it? This simple guide will do the job for you. Just follow the steps and have a butter-smooth setting of your over the range microwave. First, learn the name of the tools and materials you will need during the process.
- Measuring Tape
- Drywall saw
- Drill
- Metal shears
- Saw or jigsaw
- Caulk gun
- Hammer
- Stud finder
- Screwdrivers
- Level
- Spade bit or hole saw
- Metal duct tape
- Wood screws
- Metal screws
- Metal duct sections
- Vent cap
- Roofing cement
- Circuit breaker
- Receptacle
- Wall box
- NM cable
- Electrical box
Installing a New Electrical Circuit
There is a necessity for the microwave oven to have a 20-amp circuit with no connection with other appliances. Meaning you have to install a new electrical circuit that extends support to the oven’s power cord. Here, the power cord has to extend upwards, so your circuit place is inside the upper cabinet. Since the skills required are electrical, you must hire a professional to do it.
Making Holes for the Duct and Vent and Installing their Cap
You have to make space for the microwave to vent through its back with the ductwork running straight through the exterior wall or it’s top. Based on the convenience factor, you need to decide. However, for having the most efficient results, a short, straight run of ductwork is suitable. Running the ductwork through the wall requires a tape. Mark the area for the wall opening and cut it out using a jigsaw or drywall saw. For the roof, cut out the vent opening with the same saw. From the attic inside, make a shape on the roof cap collar, and drill pilot holes for the vent roof cap. The ducts must be made of rigid metal in round or rectangular shape. A transition fitting will connect the vent cap collar and the duct section. From the roof side, take the vent cap collar in the hole. Next, secure the vent cap by applying caulk or roofing cement. Finally, nail or screw the flanges on the vent cap for a secured fitting.
Mounting the Bracket
Most microwaves hung on the wall use a wall bracket. Here they are tightened in the front with bolts on the top cabinet and into the oven case. If your wall has a stud positioned at the center of the bracket, the task is easy. If not, then a section of the drywall is removed, and plywood is used for the bracket attachment. The skills needed at this stage are of a carpenter.
Drilling the Cabinet
Now you have to make holes using a drill in the cabinet for making way for the microwave’s power cord and unit mounting bolts.
Set the Microwave Vent
Make any changes for the microwave’s vent fitting. For example, if the microwave has a back-venting setting by default, its reconfiguration is needed to go top venting. Microwaves have rectangular exhaust openings, so you need a transition collar to change the round-shaped ductwork to rectangular for connecting with the microwave.
Position the Microwave
Lift the microwave with the help of two or more people, as it is heavy. Put the power cord up via the cabinet hole. Hook the microwave’s bottom on the wall bracket and tilt it. While one individual holds the microwave, the other inserts the bolts in the cabinet.
Connect Ductwork
Get the metal ductwork connected to the microwave’s vent opening. There are different settings for back and top venting. Both need minor adjustments to make the connection between microwave vent and the duct. Once connected, seal all joints with metal duct tape.
Complete the Installation
Lastly, install the grease filter on the microwave and plug its cord into the electrical outlet and turn on the circuit breaker. Heat a glass of water in the microwave to see if it’s working right. Do not heat empty.


No Comments
Leave a comment Cancel