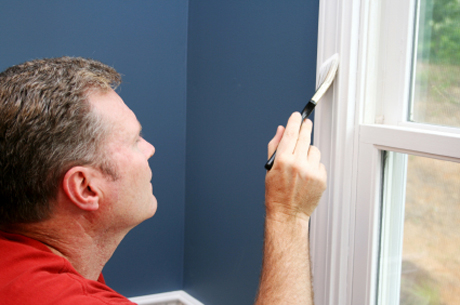
These days, it’s hardly uncommon to hear of the UK’s DIY types going about their own sash window refurbishment and painting jobs themselves, with little to no outside help whatsoever. One of the things that makes Britain so great is the way in which it’s a nation obsessed with DIY, quick-fixes and basically taking a hands-on approach to anything that needs doing. This is why the idea of calling in the pros for everyday repairs and touch-ups around the home is largely unheard of for the masses in general, unless of course something particularly serious or complicated rears its head.
Of course, when presented with dozens of millions and a somewhat endless array of smaller glass panels, it quickly becomes clear that sash window painting is somewhat in a different league to that of painting a standard window frame. The good news however is that with a little forethought and one or two tips to fall back on, it’s more than possible to achieve a brilliant job by your own hand and feel rightly proud of what you’ve accomplished.

Here’s a quick look at just a few of those tips to get things moving in the right direction:
Piece by Piece
Above all other tips across the board, nothing is more important than being sure to do one small area of one window at any one time. The absolute worst thing you can do is set about with the intent of getting a ton done all in one go, which is guaranteed to leave you in a position where you’re rushing to get things done and end up making a mess of the whole thing. Give yourself way more time than you need, don’t be stingy when it comes to attention to detail and don’t move on to the next mullion until you’re 100% happy with the one you’ve just finished.
One Coat Too Many
The unique sliding action of sash windows is of course what gives the window as a whole much of its charm. At the same time, however, it’s important to be aware of the fact that with each new coat of paint you add, you come one step closer to preventing the free movement of the panels which may eventually become stuck entirely. Sooner or later, it’s necessary to strip the existing layers of paint away before being able to then go ahead and apply another. As such, it’s crucial to take a good look at how thick the current paint is and determine whether or not it’s appropriate to add another layer.
The Right Angle
In terms of where you start and finish each window pane and mullion therein, there is indeed a right and a wrong way of going about it. If, for example, you’re right-handed and you tend to write in a ‘standard’ manner, you’ll want to start toward the window’s upper-left corner and work your way toward the lower-right. By contrast, left-handed DIY types will probably find it much easier to start at the upper-right corner and work toward the lower-left. Personal preference will of course come into the mix to a certain extent, but these are generally good rules of thumb to follow.
Don’t Sweat the Specks
As you begin to make progress, chances are you’ll find yourself spending more and more time trying to wipe those little specks of paint off the glass than you do painting the mullions and frames – the stuff gets EVERYWHERE! However, while paint tends to be a nightmare to get off anything while it’s still wet and gloopy, it’s generally a piece of cake to quickly scrape off with a razor blade once dry. As such, you’ll probably find it much easier and faster not to bother with trying to clean up every last speck as you go, but rather to wait until you’re finished and head back to the dry paint specks.
If In Doubt, Call the Experts Out
And finally, there’s a big difference between admitting defeat and doing what’s best for both yourself and your home. It always seems like a good idea at the time, but when faced with a dozen or so windows, each of which contains no less than nine or 12 smaller windows, it won’t be long before you realise the kind of mammoth task you’ve taken on. The better your sash windows are looked after during their course of their life, the better they’ll return on your investment further down the line – something to remember if at any time you’re not 100% confident in your DIY skills.


No Comments
Leave a comment Cancel